Every so often I find myself with an idle hour and decide to use that time to package some new software for Linux. A common activity among nerds, I’m sure ;). This blog post is a write up of what I did, and why, which may be useful to others with time on their hands.
I keep meaning to live stream when I do, but on this occasion I had a bad hair day was also listening to and engaging with a podcast, so it wasn’t practical. In leiu of that, while the information is fresh in my head - the morning after - I thought I’d write down some notes here.
Why do this
My Linux distro of choice is Ubuntu. A significant number of Ubuntu users are on “old” Long Term Support (LTS) releases. Some estimates put it at around 10x or 20x more users are on Ubuntu LTS releases than the interim non-LTS releases. It’s hard to get new software into the repositories of old Ubuntu releases. While it’s possible for developers to create PPAs or repositories for their software, that’s hard for new users to discover. If I make and help publish a snap for something new, that can get in users hands within hours (or even minutes), with updates coming as they’re published. I wrote a (work) blog post titled “Snaps: How we got here” if you want to know more about “why?”.
Selecting a target
There’s always something to package. Out there a new piece of software has been published, or an old program needs preservation. Perhaps someone explicitly asked for help, or there just something I think is cool, that should be easier to install for Linux users.
I use f5bot which notifies me via email when the keyword ‘snapcraft’ is mentioned on Reddit, HN or Lobsters. I’ll also get pinged by a number of friends online when they discover something and think it should be snapped. You know who you are, thanks for keep my “fun software pipeline” full. :) Sometimes I’ll browse the GitHub Trending page to see what’s new in the world. That’s a great way to find new stuff, especially
On this occasion it was a mention in a Telegram channel I saw scroll past.
Investigation
Some things make sense to snap, others less so. For example, a ’leaf’ application which is relatively new, fast moving, has complex installation instructions (for novices) might be a good candidate. A library which depends on specific kernel modules, and has esoteric hardware requirements might be less interesting, difficult, or flat out impossible.
Indeed some classes of applications are easier to package as a snap than others. Command-line utilities written using ‘modern’ languages like Go and Rust are way eaiser than large graphical applications built using bleeding-edge versions of Qt or GTK. If I only have an hour to spare, I’m likely to go for easy pickings.
From a political point of view, I’m also unlikely to touch an application where the developer has previously expressed that they don’t want their software packaged in such a way. No point wasting time packaging something if a pull request is going to be rejected. Most developers aren’t that way inclined though, and welcome having their software in more hands.
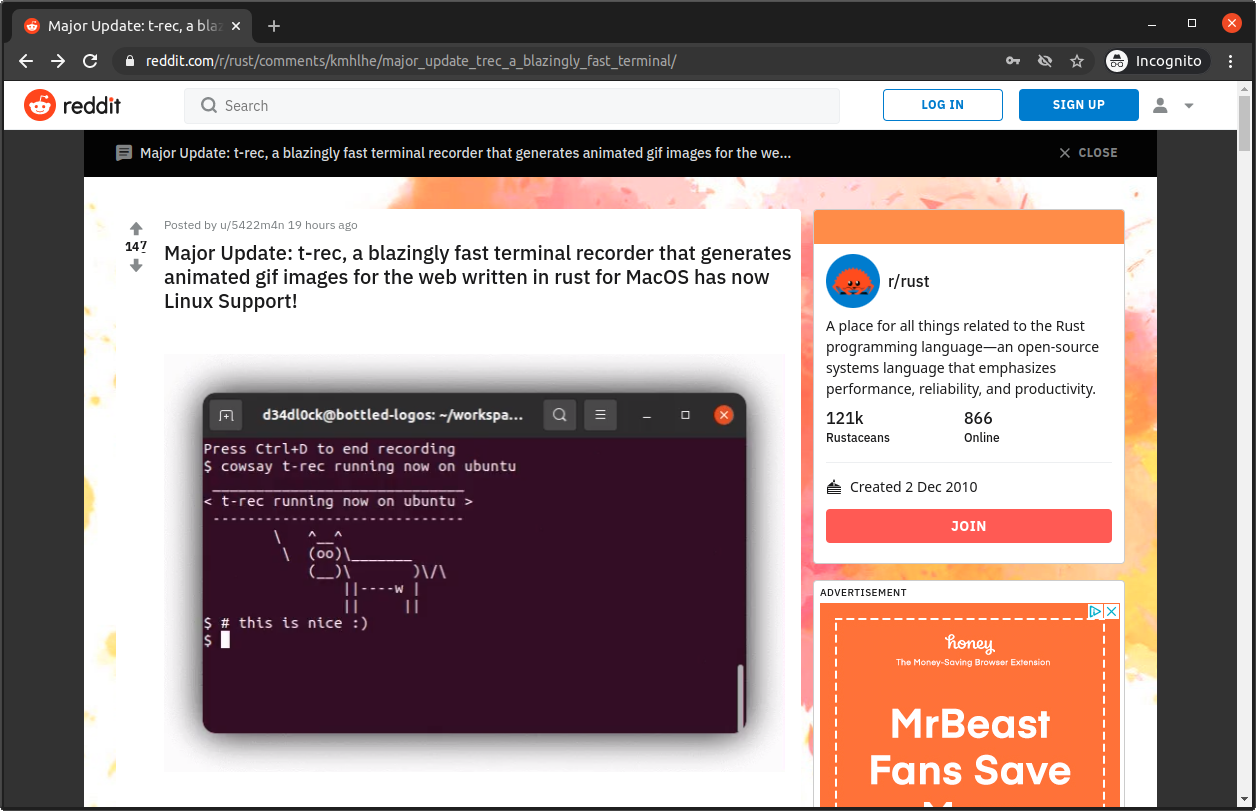
In this case the application - t-rec - is new (to Linux), is actively developed, and the developer specifically asked for help in packaging. The fact that it’s made using Rust is a bonus here. All this was gleaned in a few moments by browsing the repo. I’ve not technically committed to this project yet. This is important to note, because I will often look at something, and reject it because it will take to long, or maybe it’s a commercial application, or has some weirdness that means it’ll be a timesink. This wasn’t one of those cases, so I moved on to snapping it.
“But Alan, it’s Rust, anyone can just use curl to install rustup, then get rust, the build dependencies, and build the software from source themselves”.
You might do that, millions of others won’t / can’t / don’t.
Getting started
Fork - clone - branch
Step one! Fork!
The repository is on GitHub, so my first step is to fork the repo, clone it to my laptop and create a branch. All standard GitHub workflow stuff.
Aside: I don’t always do this. Sometimes I’ll start by creating a folder locally, and build the snap by pointing it at the upstream source. If I’m confident I can prep a PR and have it pushed in short-order, I’ll go the fork-clone-branch route. If I think this might take longer, and be something I will have to publish myself (under my own name) then I’ll build locally without forking. Maybe I’ll do a separate tutorial for that sometime.
Create a snapcraft.yaml
snap/snapcraft.yaml is the file that drives the snapcraft tool to build and package the snap.
Inside the project folder, I’ll just snapcraft init which looks like this:
$ snapcraft  init
Created snap/snapcraft.yaml.
Go to https://docs.snapcraft.io/the-snapcraft-format/8337 for more information about the snapcraft.yaml format.
The initial yaml looks like this:
name: my-snap-name # you probably want to 'snapcraft register <name>'
base: core18 # the base snap is the execution environment for this snap
version: '0.1' # just for humans, typically '1.2+git' or '1.3.2'
summary: Single-line elevator pitch for your amazing snap # 79 char long summary
description: |
  This is my-snap's description. You have a paragraph or two to tell the
  most important story about your snap. Keep it under 100 words though,
  we live in tweetspace and your description wants to look good in the snap
  store.

grade: devel # must be 'stable' to release into candidate/stable channels
confinement: devmode # use 'strict' once you have the right plugs and slots

parts:
  my-part:
    # See 'snapcraft plugins'
    plugin: nil
We’re going to almost completely replace this, but it’s a nice starter, as it reminds of the minimum bits needed to build a snap.
Metadata
This is the easiest bit! I just yoink the details from the upstream repository. Typically this is copy/paste territory. The one you need to be careful of however, is the name:. This is the registered name of the application in the store, and shouldn’t already be taken by someone else. I didn’t actually check, but t-rec seemed pretty unlikely to be used already. (I have subsequently checked by running snapcraft register t-rec and it wasn’t taken (but is now :))).
name: t-rec
summary: Terminal Recorder - t-rec
description: |
  Blazingly fast terminal recorder that generates animated gif images for the web written in rust.
We also have adopt-info which I’ll come back to below.
adopt-info: t-rec
Choose a base
The default base is core18. That means when this snap is built it will do so (by default) inside an Ubuntu 18.04 LTS VM (or container). When the user installs the snap they’ll need the core18 snap too (which will be installed automatically) which contains a super minimal (~ 58MiB) Ubuntu 18.04 base system.
Ubuntu 18.04 LTS is supported, but it’s coming up on 3 years old now. So I decided to go for core20 for my base. There’s a few side-effects of this. Firstly, logically perhaps, it will build the snap inside an Ubuntu 20.04 LTS VM or container, not Ubuntu 18.04 LTS. On the end user system, they’ll need the minimal (~ 64MiB) core20 to match - which again, will be automatically installed for them.
A second effect of choosing core20 is that snapcraft (the tool) has had some behavioural changes, and updates to features between core18 and core20 based snaps. There are a few features missing in snapcraft when building a core20 snap as opposed to a core18 based snap. One example is the currently missing “GNOME Extension” - but I don’t need that because this is a command-line utility, not a GTK / GNOME application.
Basically core18 is recommended. I’m only doing this because I know I don’t need anything that’s currently ‘missing’ from snapcraft for core20.
base: core20
Confinement
Snaps have (simply) two confinement models. strict confinement in which you (as the publisher) specify a set of plugs which interface the application to resources on the system such as camera, x11, wayland, audio-playback and so on. classic confinement is (essentially) unconfined, so the application being snapped behaves much like any other binary on the host, unrestricted by apparmor or cgroups as strict snaps are.
We usually urge developers to aim for strict confinement. That’s not going to work for t-rec because the nature of the application requires it to be able to run any arbitrary binary on the system. strict confinement would block this, making the application pretty much useless.
confinement: classic
If this snap works, and the developer accepts the PR, and decides to publish it in the store, then they’re going to have to request classic confinement. You can’t just make a classic snap and publish it in the stable channel of the Snap Store, the review tools on the backend won’t allow it. There’s a process for vetting applications and publishers, which the
Future Alan with a spoiler here: The upstream publisher accepted the PR, pushed the snap to the Snap Store, and has requested classic confinement. Once Canonical sleep off the new year, they’ll/we’ll action that.
Grade
Just set this to stable and we’ll move on. I personally wish this would go away. Just set it and forget it, that’s what I do.
grade: stable
Part(s)
Ok, here’s where we get to the meat and vegetables of the snap. This is where we define how to build the software we’re planning to put inside the snap.
t-rec is a Rust application, which snapcraft knows how to build. So we just specify the rust plugin, location of the source files - . - because we’re sat in the repo.
Recall earlier where I mentioned sometimes I create a folder and build the snap locally without forking. In that case I’d set source: https://github.com/sassman/t-rec-rs.git, and at build time snapcraft would get the source directly from the main branch (or whatever source-tag or source-branch I specify).
parts:
  t-rec:
    plugin: rust
    source: .
You can run snapcraft help rust to learn more about that rust plugin.
The upstream developer has a nice README.md which details the additional requirements needed when building the snap, and things required at runtime. It’s a pretty minimal list, which is neat.
sudo apt-get install libx11-dev imagemagick
Isn’t it handy that developers use Ubuntu to build their software ;). I don’t need to translate package names from some other distro here!
Note that one is a -dev package - which will be required at build-time, the other is a toolkit of image manipulation utilities, which I guess we need at runtime to create the .gif this application is designed to make. So we specify those like this:
    build-packages:
      - libx11-dev
    stage-packages:
      - imagemagick
At build time snapcraft will pull in libx11-dev in the build VM (or container) to ensure t-rec builds okay. It will also stuff imagemagick into the final snap, so t-rec can find it.
Set version
When the snap builds, it needs a version number to stamp on the file. A typical snap filename looks like snapname_version_architecture.snap. So mine will end up as t-rec_v0.4.0_amd64.snap, hopefully. There’s a variety of ways to enumerate the version number. I’m going to just use the git tag. We do this in the override-pull: section, which is just a shell script that gets run at build time by snapcraft just prior to the actual build itself. We use snapcraftctl pull to tell snapcraft to just do whatever it does to pull the source for this part specified in source: earlier, then we jump in and set the version for the project. This is consumed by adopt-info up the top of the yaml metadata.
    override-pull: |
      snapcraftctl pull
      snapcraftctl set-version "$(git describe --tags)"
Build overrides
Sometimes developers have weird build systems, or sets of commands that need to be run, which diverge from a typical rust, cmake, or autotools plugin expectations. This is fine, because we can override the build process, just as we can override the pull stage. In this case I’m going to create a symlink because t-rec expects a binary called usr/bin/convert to exist, which (for whatever reason) doesn’t happen when we staged imagemagick earlier. I use an environment variable set inside snapcraft at build-time called SNAPCRAFT_PART_INSTALL which points to the internal directory where the final assets for this part are assembled. So we run the build as per the plugin expectations with snapcraftctl build then we jump in after and ninja our symlink.
    override-build: |
      snapcraftctl build
      cd $SNAPCRAFT_PART_INSTALL/usr/bin
      ln -s ./convert-im6.q16 ./convert
I discovered this after doing a successful build, but the application would error, saying it couldn’t fine usr/bin/convert. I did a quick find /snap/t-rec/current on the installed snap (although less t-rec_v0.4.0_amd64.snap would also have worked) to see what files were delivered. Perhaps convert was in another location. Then I remembered that the convert binary on Debian based systems points to /etc/alternatives/convert which in turn points to /usr/bin/convert-im6.q16:
alan@robot:~$ which convert
/usr/bin/convert
alan@robot:~$ ls -l /usr/bin/convert
lrwxrwxrwx 1 root root 25 Aug 17 14:54 /usr/bin/convert -> /etc/alternatives/convert
alan@robot:~$ ls -l /etc/alternatives/convert
lrwxrwxrwx 1 root root 24 Aug 17 14:54 /etc/alternatives/convert -> /usr/bin/convert-im6.q16
When the imagemagick deb is pulled into the snap, this dance doesn’t happen. So I worked around that with the symlink.
Build it
Iterate
At this point I typically try building the snap - even though the yaml isn’t actually finished yet. More on that below. But for now, let’s try and build the snap.
Note: By default snapcraft will use Multipass. I prefer to use LXD. I already have lxd configured on my desktop, but if I didn’t then snap install lxd and sudo lxd init --auto followed by logging out/in (to add me to the lxd group) usually works for me.
Ok, from the repo directory I run this:
snapcraft --use-lxd --debug --shell-after
--use-lxd- will spin up a container usinglxd. The OS release will match thebasespecified earlier, in this case Ubuntu 20.04 LTS.--debug- if the build fails for whatever reason,snapcraftwill leave me ‘inside’ a shell in the container (or indeed the VM if using multipass) in which I can poke around to debug why it failed. I can also re-runsnapcraftinside the container which saves a little time as it won’t need to start it up again then shell in. The project repo folder is mapped into the container (or VM) so it’s possible to continue editing the yaml from ‘outside’ the environment, and iterate by re-runningsnapcrafton the ‘inside’. I find this a super quick way to work on a snap.--shell-after- is exactly the same as--debugbut it always drops you to a shell inside the container, even if the build was successful. I do this because sometimes I want to poke around and see what built even if it worked fine.
Here’s some of the end of the output of it running the build:
   Compiling crossbeam-deque v0.8.0
   Compiling rand_chacha v0.2.2
   Compiling rand v0.7.3
   Compiling tempfile v3.1.0
   Compiling x11rb v0.7.0
   Compiling jpeg-decoder v0.1.20
   Compiling tiff v0.6.1
   Compiling image v0.23.12
    Finished release [optimized] target(s) in 1m 04s
  Installing /root/parts/t-rec/install/bin/t-rec
   Installed package `t-rec v0.4.0 (/root/parts/t-rec/build)` (executable `t-rec`)
warning: be sure to add `/root/parts/t-rec/install/bin` to your PATH to be able to run the installed binaries
Staging t-rec
Priming t-rec
Snapping |
Snapped t-rec_v0.4.0_amd64.snap
snapcraft-t-rec #
Note here I’m left in the container, which is named snapcraft-(snapname). Just CTRL+D to drop back to my main machine.
snapcraft-t-rec # exit
alan@robot:~/Source/popey/t-rec-rs$
Nearly there
Ok, so we have a snap which builds, but it won’t actually work! That’s because despite building a t-rec binary, and bundling some binaries which came with imagemagick, we haven’t exposed them to the world outside the snap. We do that with an apps stanza. We only really need to expose one binary t-rec from the snap to the host.
apps:
  t-rec:
    command: bin/t-rec
I didn’t specify any plugs: for this command because it’s a classic confined snap, so is effectively unconfined. If it were strictly confined I’d consult the documentation to identify the right interfaces to make the application function while confined. Not needed here.
The app name matches the snap name. As such, once installed a binary called t-rec will appear in /snap/bin which will setup the environment and run this rust binary we built. If we wanted to (for some reason) expose the imagemagick usr/bin/convert binary to the outside world we could do this:
  convert:
    command: usr/bin/convert
However, as that command doesn’t match the name of the snap, and may collide with another binary on the host of the same name, it gets namespaced on install. So that would be t-rec.convert. I don’t need to expose that binary, so I didn’t do this.
With the apps: stanza added, we re-run snapcraft as above, and we get a successful build.
Install & Test
Installing locally is done with:
snap install t-rec_v0.4.0_amd64.snap --dangerous --classic
--dangerous- is you acknowledging that this snap didn’t go through the Snap Store review process. It could just as easily have been handed to you on a USB key, or maybe I downloaded it from a random URL. I’m saying I trust it, given I built it.--classic- is you acknowledging that this is an unconfined application, and as such has free reign over whatever your user is able to do. Just like binaries you install from a PPA or the Ubuntu repository ;).
I tested the application by opening a new terminal, ran the application for the first time and got this:
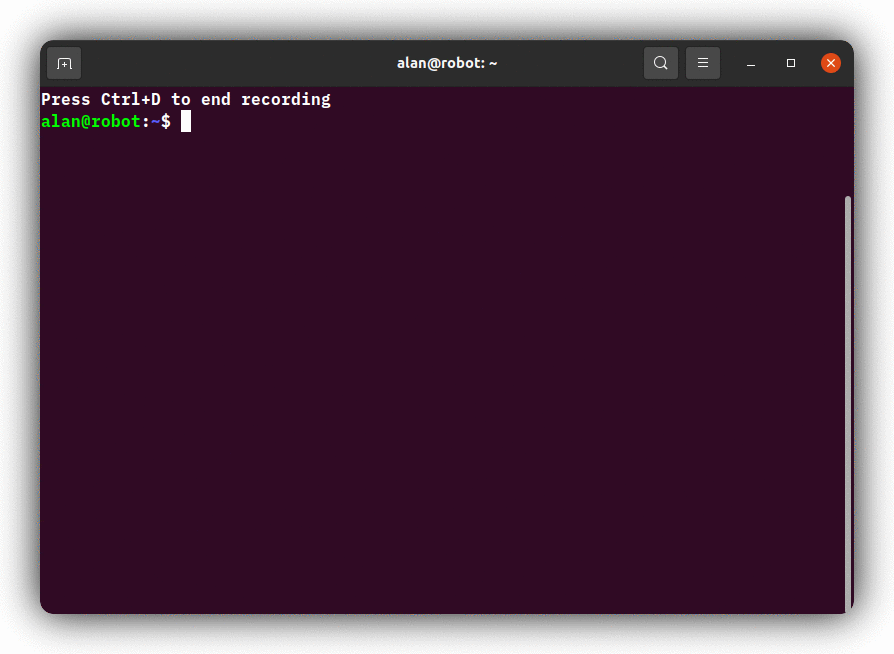
Narrator: It worked.
Submit PR
Here’s the final yaml I submitted as a pull request to the upstream project.
name: t-rec
base: core20
adopt-info: t-rec
summary: Terminal Recorder - t-rec
description: |
  Blazingly fast terminal recorder that generates animated gif images for the web written in rust.

grade: stable
confinement: classic

parts:
  t-rec:
    plugin: rust
    source: .
    override-pull: |
      snapcraftctl pull
      snapcraftctl set-version "$(git describe --tags)"
    override-build: |
      snapcraftctl build
      cd $SNAPCRAFT_PART_INSTALL/usr/bin
      ln -s ./convert-im6.q16 ./convert
    build-packages:
      - libx11-dev
    stage-packages:
      - imagemagick

apps:
  t-rec:
    command: bin/t-rec
Conclusion
Once the upstream developer has done the necessary dances to get classic confinement approval and publish to the Snap Store, the t-rec snap will be available for anyone running Ubuntu 14.04 through 20.10 and a ton of other distros too, with a simple snap install t-rec. I did see an amusing suggestion on reddit that they should have called it t-recs, which does indeed sound better. If they want to do that, there’s only a few simple changes required in the yaml above.
These rust-based snaps are super fun to make. I cloned the repo at 19:32 last night and pushed the PR at 20:21. Not bad given I was also chatting on a podcast at the same time.
Hope that’s interesting to some of you. Happy snapping. 🥰